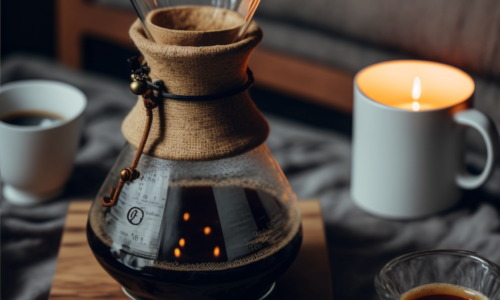
The Moka pot, an iconic Italian stovetop coffee maker, has been a staple in many households for decades. Known for producing rich and bold coffee, the Moka pot offers a unique brewing experience that bridges the gap between drip coffee and espresso. The resulting brew is strong, aromatic, and perfect for those who crave a more robust cup of coffee.
In this blog post, we will guide you through the process of using a Moka pot to create a delicious and satisfying cup of coffee. Whether you are a seasoned coffee enthusiast or just starting your journey, this step-by-step guide will provide you with everything you need to know to master the Moka pot.
Moka Pot Mastery
Before we dive into the brewing process, let’s review the essential equipment and ingredients required for using a Moka pot:
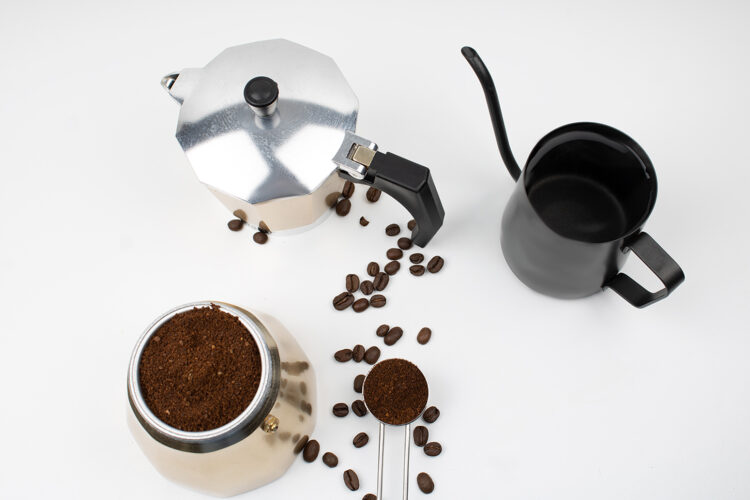
Moka pot: This stovetop coffee maker comes in various sizes, typically ranging from 1 to 12 cups. Select the size that best suits your needs.
Coffee beans: Choose high-quality, freshly roasted coffee beans for the best flavor. Opt for a flavor profile that appeals to your taste preferences (e.g., fruity, chocolatey, or nutty).
Coffee grinder: A burr grinder is recommended for a consistent and even grind size, which is essential for proper extraction.
Fresh, filtered water: The quality of the water you use will significantly impact the taste of your coffee. Always use fresh, filtered water for the best results.
Stove or heat source: A Moka pot is designed to work on various stovetops, including gas, electric, and induction. Ensure that your heat source is compatible with your Moka pot.
Kitchen towel or oven mitt: This will protect your hand when handling the hot Moka pot during the brewing process.
Measure and Grind Your Coffee Beans
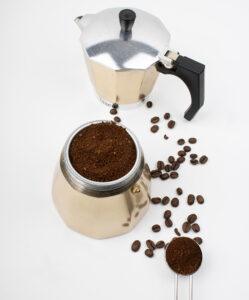
First, measure the appropriate amount of coffee beans based on the size of your Moka pot. The Moka pot’s coffee chamber will serve as a guide for the correct amount of coffee needed. Generally, it is best to fill the chamber without compressing the grounds.
Once you have measured your coffee beans, grind them to a medium-fine consistency, slightly coarser than espresso grounds but finer than drip coffee. This grind size will allow for optimal extraction and prevent coffee grounds from passing through the Moka pot’s filter.
Fill the Bottom Chamber with Water
Fill the Moka pot’s bottom chamber with fresh, filtered water up to the fill line or just below the pressure relief valve. The fill line may be marked on the inside of the chamber, or you may need to gauge the appropriate water level by eye. Using too much water may cause the Moka pot to over-pressurize, while too little water may result in a burnt or bitter taste.
Add Coffee Grounds to the Filter Basket
Place the filter basket on top of the bottom chamber, and carefully pour your freshly ground coffee into the basket. Create an even and level bed of coffee grounds by gently tapping the sides of the filter basket. Do not tamp or compress the coffee grounds, as this may cause over-extraction or prevent water from passing through the grounds.
Assemble the Moka Pot
Hold the Moka pot’s top chamber with a kitchen towel or oven mitt to protect your hand, as the metal may be hot if it has been preheated. Carefully screw the top chamber onto the bottom chamber, ensuring a tight seal. Avoid over-tightening, as this may cause the Moka pot to warp or become difficult to disassemble later.
Heat the Moka Pot
Place the assembled Moka pot on your stove or heat source, ensuring that it is properly centered and stable. Set the heat to medium-low. Too high a heat can cause the coffee to extract too quickly, resulting in a bitter taste. Conversely, too low a heat can lead to under-extraction and a weak coffee.
Monitor the Brewing Process
As the water in the bottom chamber heats up, pressure will build, forcing the water through the coffee grounds and up into the top chamber. You will hear a gurgling sound as the coffee starts to flow. Keep a close eye on the brewing process and listen for the changes in the sound.
When the coffee in the top chamber reaches about 80-90% full, you may notice a change in the gurgling sound and see a lighter-colored liquid, indicating the end of the brewing process. At this point, it’s time to remove the Moka pot from the heat.
Remove the Moka Pot from the Heat and Cool the Bottom Chamber
To prevent over-extraction and a burnt taste, promptly remove the Moka pot from the heat when the brewing process is complete. To halt the extraction process, you can cool the bottom chamber by running it under cold water or placing it on a wet towel. Be cautious when handling the Moka pot, as it will be hot.
Pour and Enjoy Your Coffee
After cooling the bottom chamber, carefully open the Moka pot’s top lid and pour the coffee into your favorite cup. The resulting brew will be rich, bold, and full-bodied. Enjoy your delicious Moka pot coffee!
Tips for Improving Your Moka Pot Coffee
Preheat your water: Using preheated water can reduce the time the Moka pot spends on the stove, minimizing the risk of a metallic taste from the aluminum chamber.
Experiment with grind size: The optimal grind size for a Moka pot can vary depending on the coffee beans and your taste preferences. Feel free to experiment with slightly finer or coarser grinds to achieve the perfect extraction.
Clean your Moka pot regularly: Coffee residue and oils can build up inside your Moka pot, affecting the taste of your brew. Regularly disassemble and clean your Moka pot with warm water and mild detergent. Avoid using abrasive materials that could damage the pot’s surface.
Store your coffee beans properly: Keep your coffee beans in an airtight container, away from direct sunlight, heat, and moisture. This will help maintain their freshness and flavor.
Conclusion
The Moka pot offers a unique and rewarding brewing experience that allows you to enjoy a strong, bold cup of coffee at home. By following this step-by-step guide and understanding the nuances of the Moka pot brewing process, you can consistently produce a delicious and satisfying cup of coffee. Don’t be afraid to experiment with different coffee beans, grind sizes, and brewing techniques to find the perfect combination that suits your taste. Happy brewing!
Advanced Techniques and Variations for Moka Pot Coffee
Now that you’ve mastered the basics of brewing with a Moka pot, let’s explore some advanced techniques and variations to elevate your coffee experience further.
Adjust the Coffee-to-Water Ratio: Although the Moka pot’s design dictates the coffee-to-water ratio, you can still make small adjustments to suit your taste. Try using slightly more or less coffee in the filter basket to create a stronger or milder brew.
Add a Pinch of Salt: Adding a small pinch of salt to the coffee grounds before brewing can help balance the flavors and reduce bitterness. The salt enhances the coffee’s natural sweetness and highlights its subtle flavor notes.
Create a Faux Crema: The Moka pot doesn’t produce a true crema like an espresso machine, but you can create a faux crema by pouring the first few drops of coffee that come out of the spout back into the filter basket. This will mix with the remaining coffee and create a frothy layer on top of the final brew.
Incorporate Milk and Other Additions: If you prefer a creamier coffee, you can froth milk using a milk frother or steam wand and create a Moka pot cappuccino or latte. Alternatively, you can add a splash of cream or a flavored syrup to customize your coffee.
Brew a Moka Pot Americano: For a milder coffee experience, you can make a Moka pot Americano by diluting the strong Moka pot coffee with hot water. This will create a coffee similar in strength and taste to a regular drip coffee.
Try Different Coffee Beans and Roasts: The Moka pot works well with various coffee beans and roast levels. Experiment with different origins, roasts, and flavor profiles to discover the combinations that best suit your palate.
Combine Moka Pot Coffee with Cold Brew: For a refreshing summer drink, combine equal parts Moka pot coffee and cold brew concentrate over ice. This combination creates a balanced and smooth iced coffee with a kick of bold flavor from the Moka pot brew.